
Small electronics? Sign me up! Personally, I really like the Particle Photon. They are essentially an Arduino with WiFi, and because of this, you get a lot of extra cloud perks. That’s for another discussion. I know there are likely cheaper ways to accomplish this same thing, but I really like these devices.
I’ve been working with PTZOptics on their fancy robotics API and wanted to actually take it the robotics/hardware route. I’ve covered their API already using Visual Basic, and knew there was more fun to be had. So what did I do? I hit eBay and looked for cool Arduino shields that could help control the cameras. I’ve never used a character display and I’ve always fancied using them for various projects so I definitely wanted to include that. I knew I’d need some buttons or perhaps a joystick to move the camera, so that would need to be included, too.
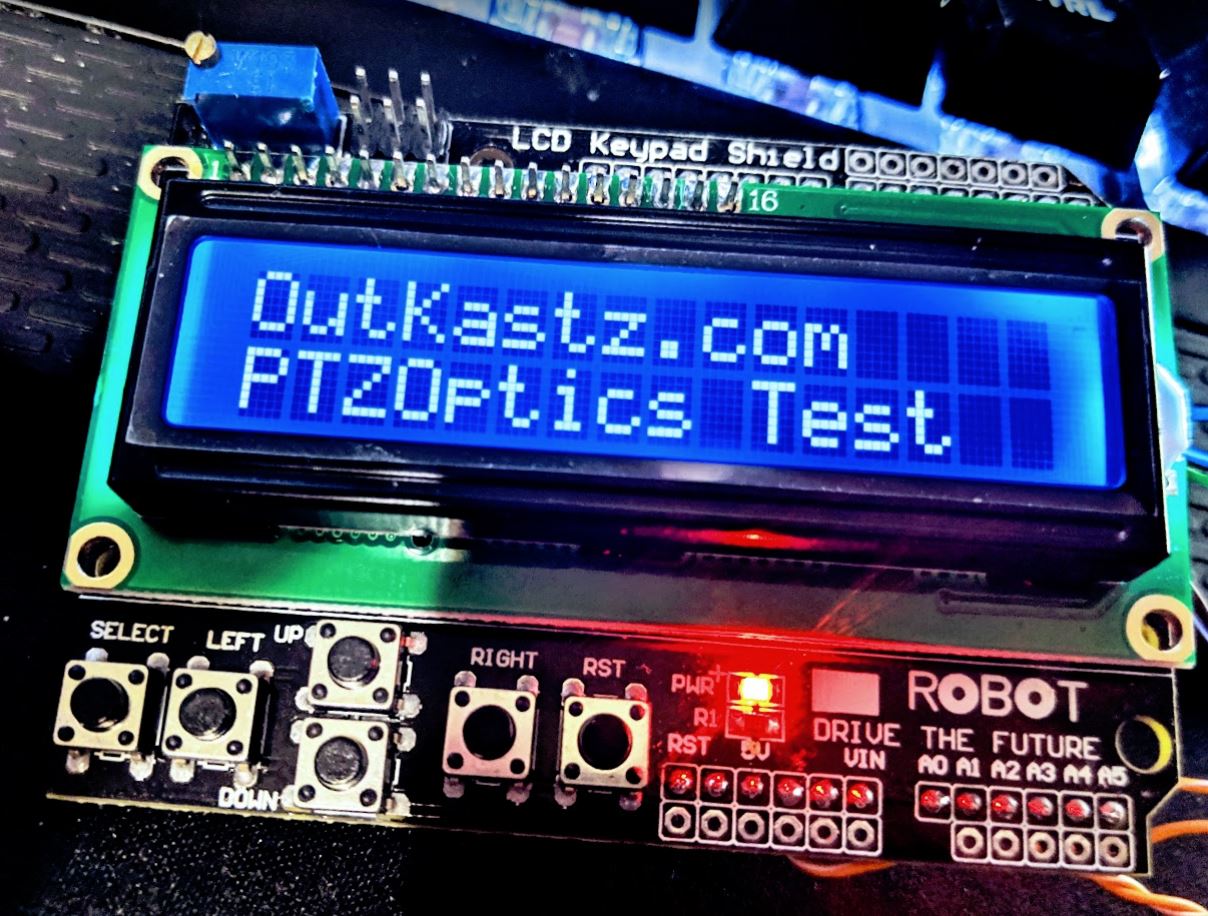
What was I finding? Buying a 1602 (16 characters on 2 rows) character display LCD was extremely cheap. I was also able to find something called a LCD Keypad Shield. This included the same 1602 character display as well as 6 buttons. This was perfect. As an added bonus, it was only something like $6 shipped from a US seller.

US shipping doesn’t mean it’s Amazon Prime next day delivery, so I had 5 or 6 days to think about the project. I theoretically already developed the main portion of the controller for the particle for a previous PTZOptics project. I just needed to retrofit the fancy display and buttons and we’d be good to go.
Finally, my toy had arrived in the mail! Unfortunately, I left my good soldering stuff at work and I’d need to improvise if I wanted to play with this today. I didn’t have a breadboard, jumpers, or anything. It was just me, my computer, photon, some cat5, and this fancy lcd keypad shield. I got a bit creative, it didn’t need to be a final product by the end of the night, I just wanted it to work. I do not recommend going this route, but for the impatient, it works.
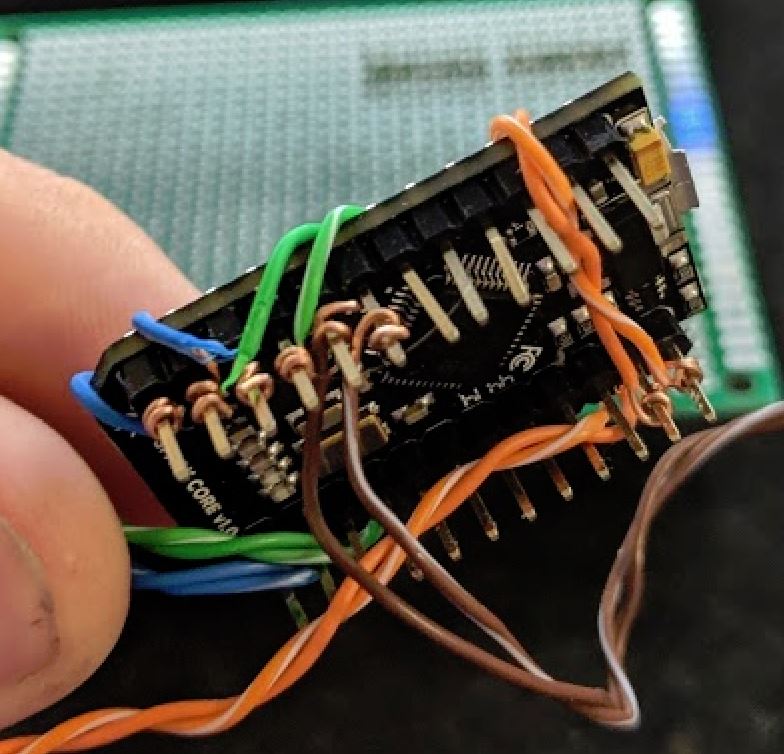
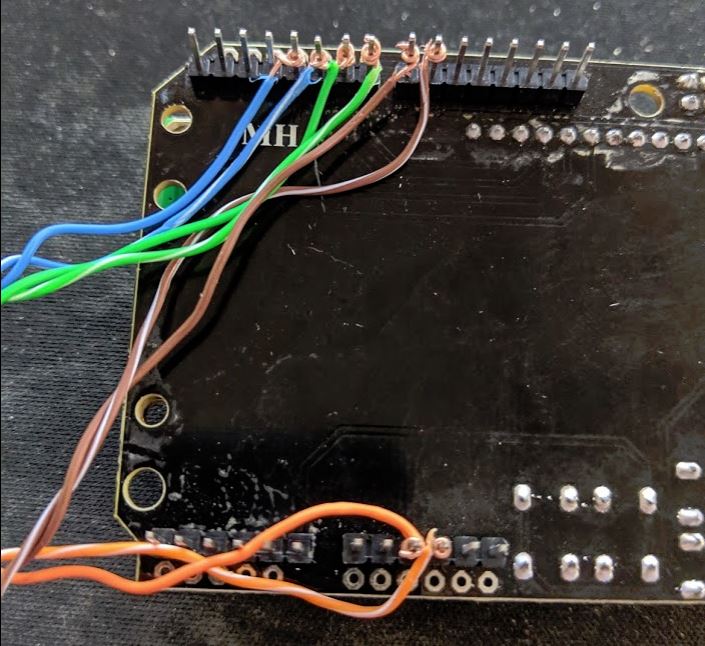 Did I seriously just twist the wire really carefully around each pin? You betcha! Again, this is not recommended by anyone, anywhere. Not my proudest moment. Oh, it worked though. For that night’s experiment I had only hooked up the screen and power. Now to add some libraries and a couple lines of code and we were in business!
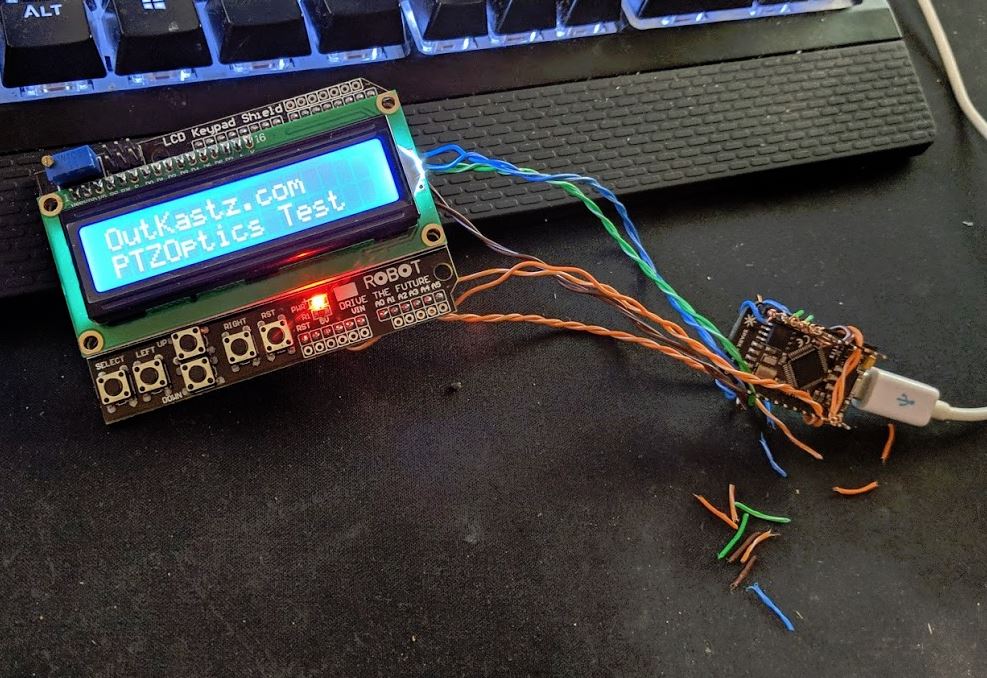 I was finally the hacker-man I’d always dreamed of being. I just couldn’t breathe in my office as it might short out. This was as far as I wanted to go for the night. The next day would involve soldering, and lots of it. Since this gets a bit more in depth, I’ve decided to break it into a couple posts. Stay tuned for part 2!